OPC UA的全名是OPC Unified Architecture(OPC统一架构)。是OPC基金会应用在自动化技术的机器对机器网络传输协议。有以下的特点:
我们可以通过虚拟机运行CS Simulator,在本机即可测试相关脚本能否正常运行,本部分知识详见:如何安装并使用CS虚拟机
虚拟机安装完成后,我们需要在Simulator中安装OPC UA Server插件,这样我们才能在电脑上进行连接测试,插件安装操作步骤如下:
步骤1
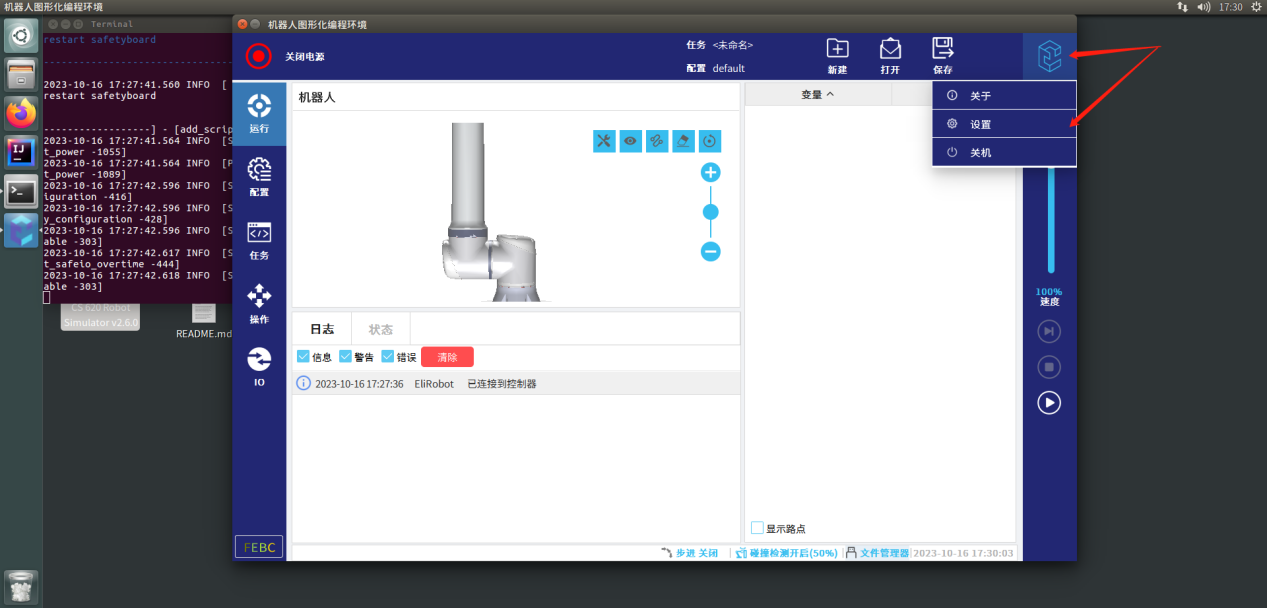
进入虚拟机,打开运行桌面上需要进行测试型号的Simulator,程序加载完成后,点击右上角的Logo,选择菜单中的设置项进入设置界面
步骤2
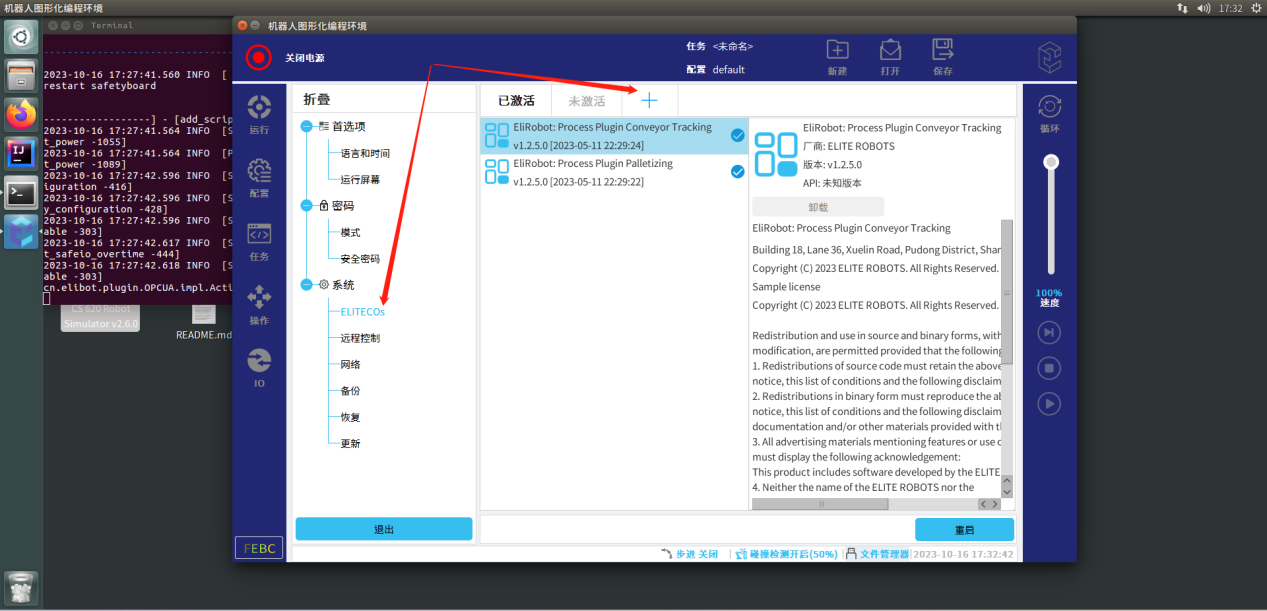
点击左侧菜单中的ELITECOs,然后点击+号添加插件
步骤3
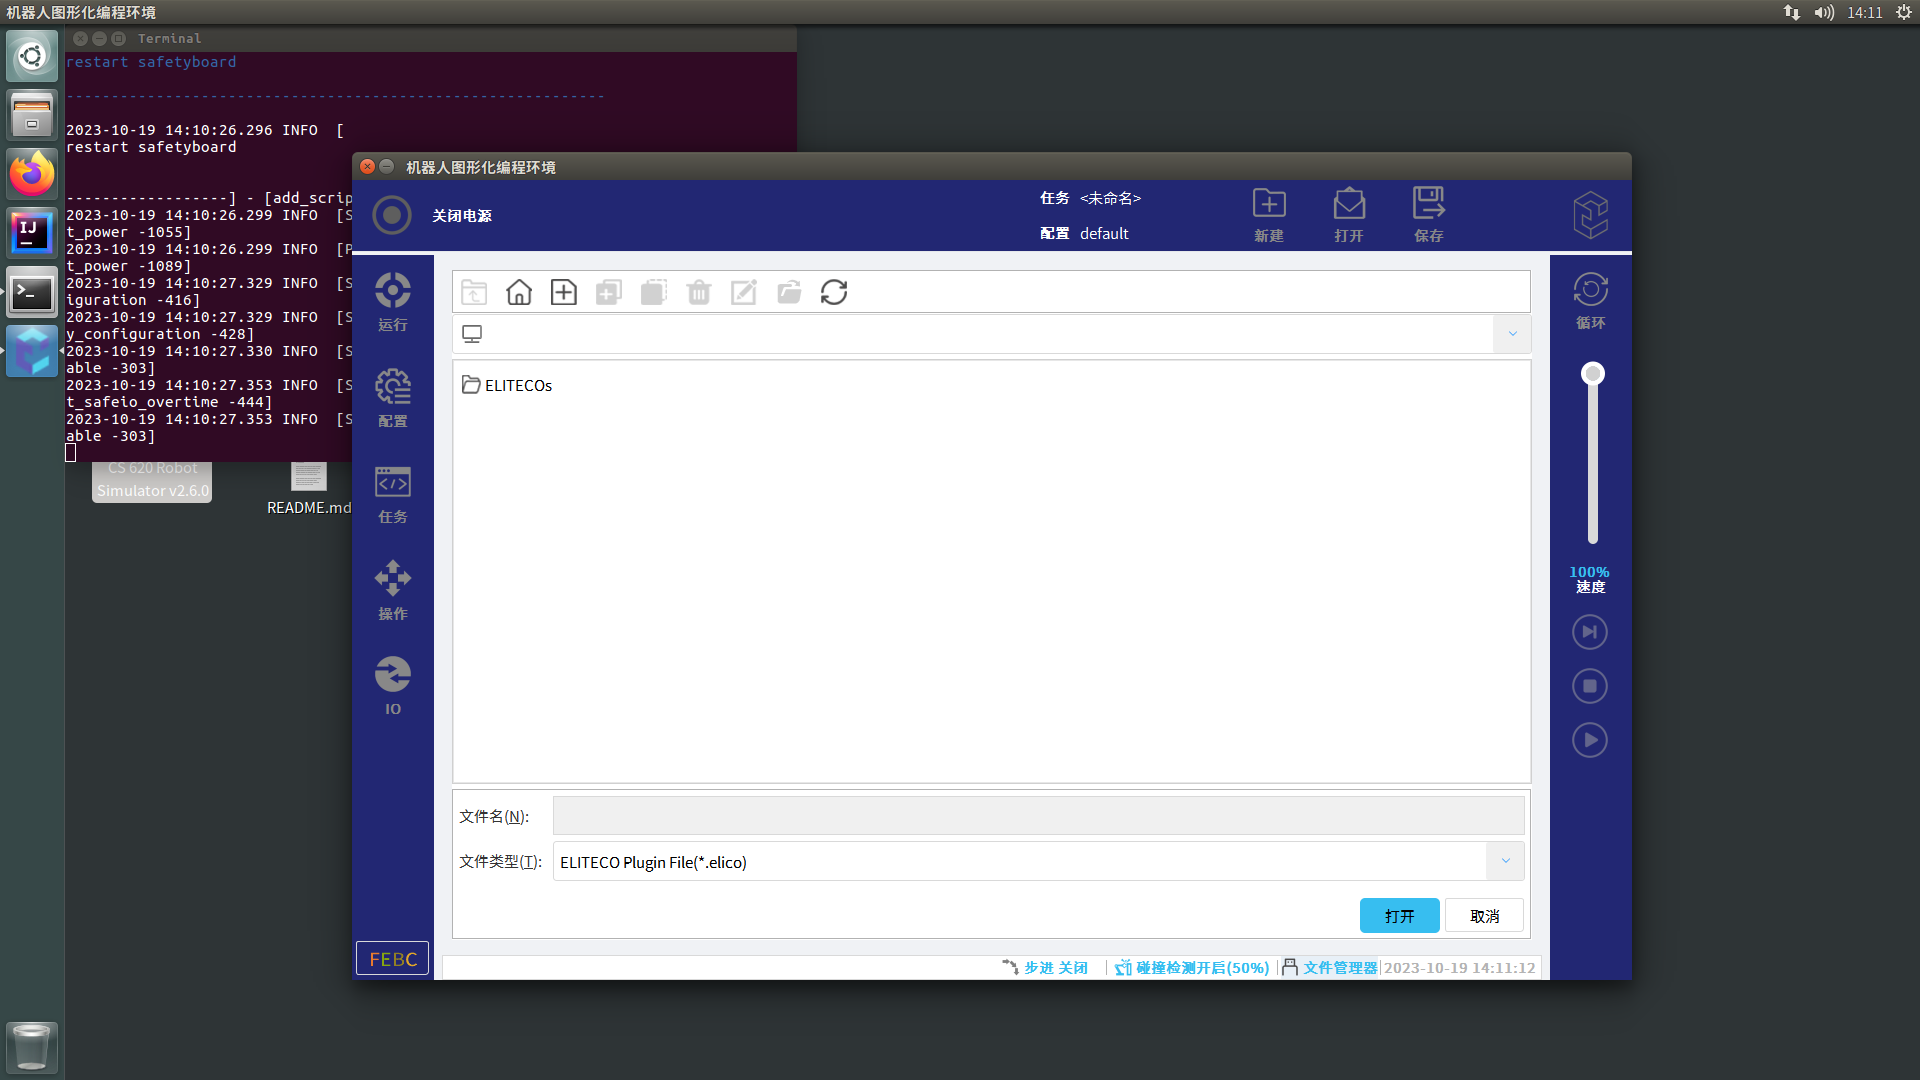
双击文件夹ELITECOs进入后双击文件夹fieldbus进入后双击文件夹OpcuaServer,选择文件EliOPCUAServer-1.2.6.0.elico并打开

步骤4
点击界面上的未激活tab,即可找到刚刚安装的插件,点击重启按钮并确认激活插件

步骤5
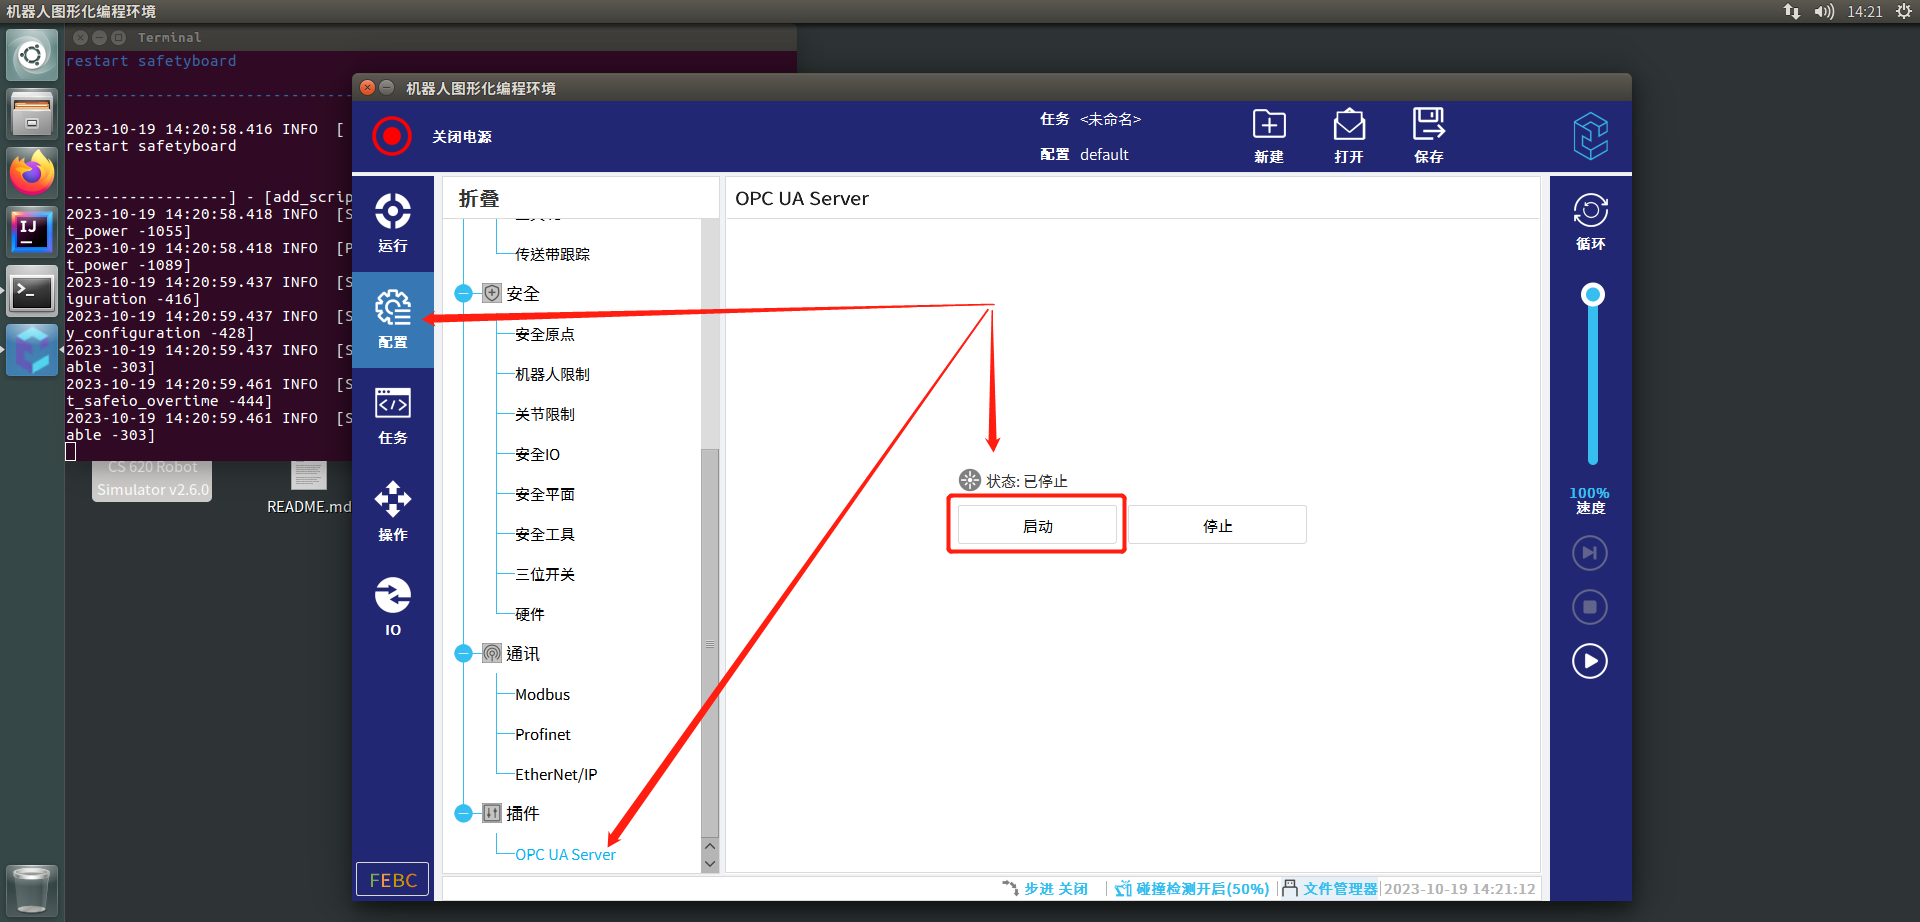
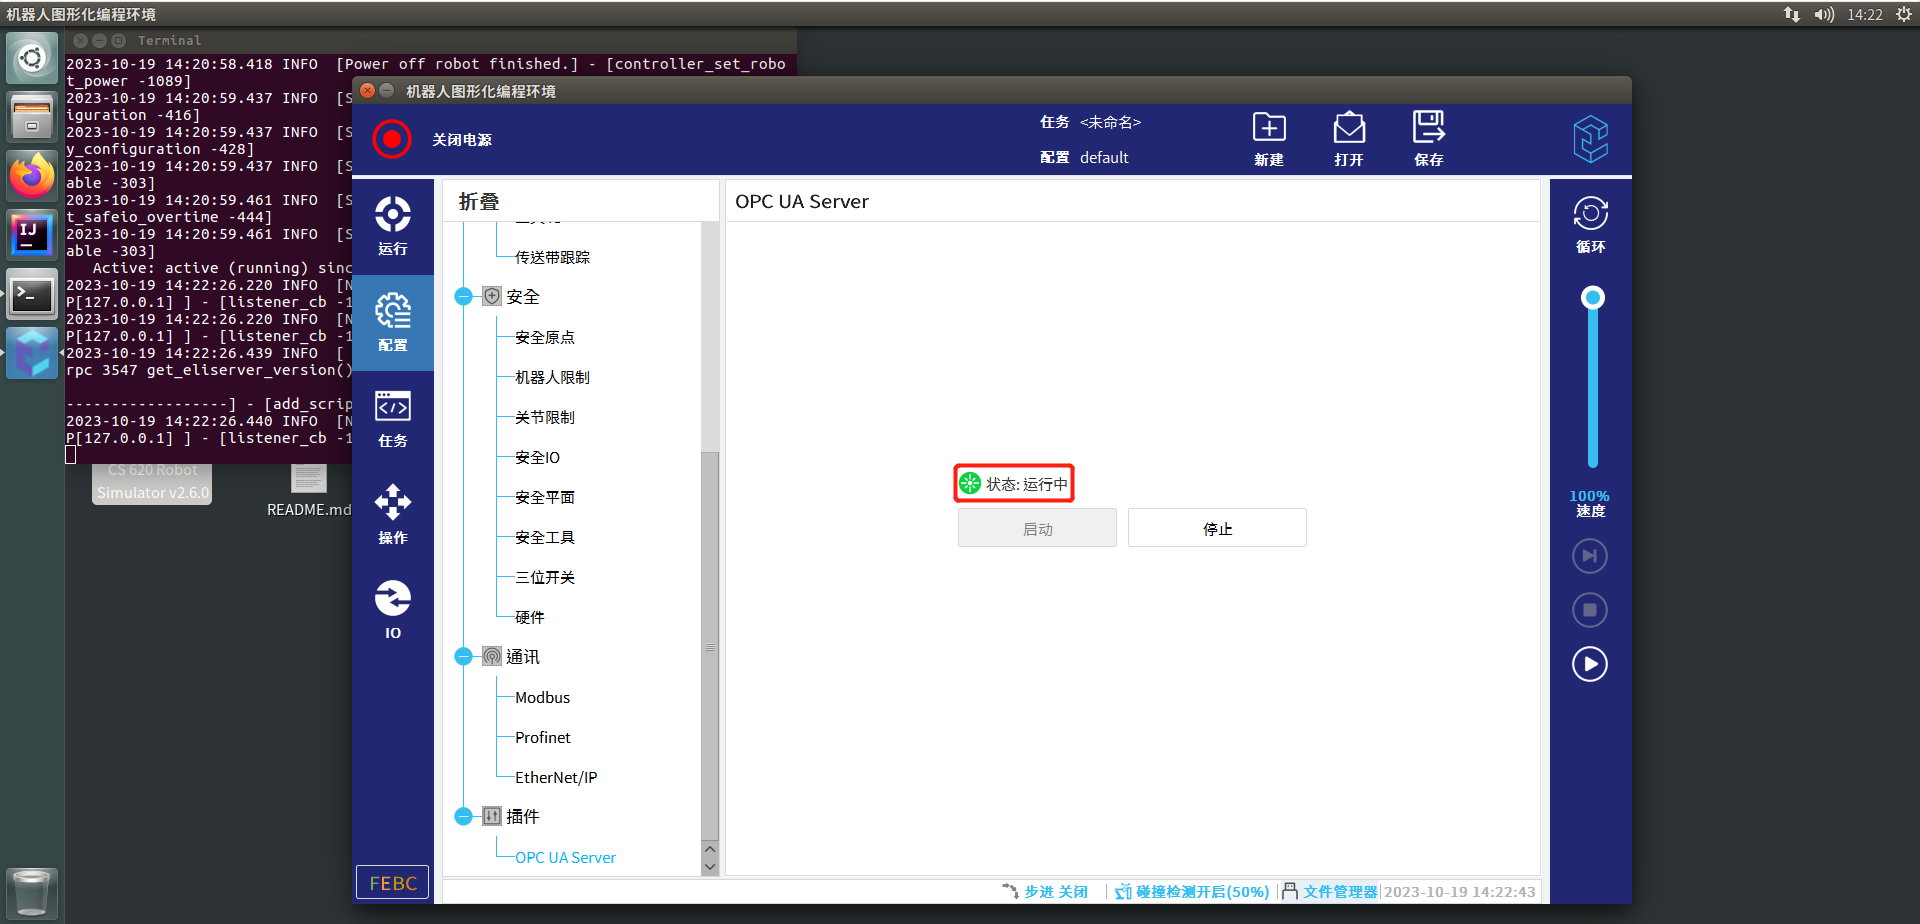
再次点击打开桌面上的Simulator,点击配置按钮,找到最底部插件菜单中的OPC UA Server插件,点击启动按钮启动OPC UA Server服务
步骤6
等待界面状态变为运行中,说明OPC UA Server已成功启动
首先我们可以通过UaExpert连接到OPC UA Server测试连接是否成功并查看相关节点信息,该部分的安装和使用方法可见OPCUA手册,打开虚拟机桌面上的EliSim Program,打开ELITECOs文件夹,打开fieldbus文件夹,打开OpcuaServer文件夹,打开docs文件夹,打开CS用户手册-OPCUA.pdf即可查看到手册内容
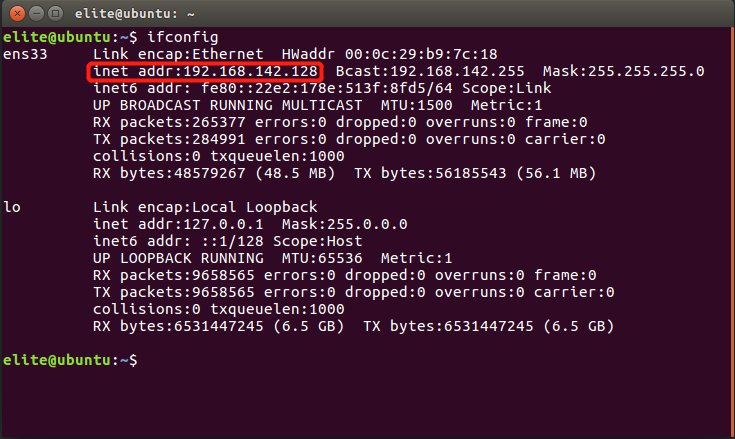
关于OPC UA Server的IP,我们可以在虚拟机的Terminal中输入ifconfig查询
成功连接后我们可以将节点拖进Data Access View中查看信息,在Attributes窗口中我们可以看到该节点的NodeId

那么我们应该如何通过Python进行节点信息的读取和方法的调用呢?
FreeOpcUa(官网:http://freeopcua.github.io/)提供了一些开源的工具来帮助我们通过Python脚本进行OPC UA协议的连接。以下我们将讲述asyncua(https://github.com/FreeOpcUa/opcua-asyncio)的使用方法:
Python的环境搭建相关操作步骤在此不再赘述,假定系统中已经安装了Python且版本大于3.7(经测试3.7版本下运行相关脚本可能会发生一定的问题,如果电脑中的Python版本不符合要求,建议重新下载安装符合要求的Python环境)
步骤1
通过pip安装asyncua
pip install asyncua 安装完成后新建一个Python脚本文件运行以下命令
import asyncua
print(asyncua.__version__) 能够正确返回版本号则说明我们已经成功安装了asyncua,通过官方文档(https://opcua-asyncio.readthedocs.io/),我们可以了解到它的相关使用方法
步骤2
现在我们可以编写脚本进行OPC UA协议通讯了。下面我们给出一个简单的模板,通过它我们可以获取节点的信息以及进行方法的调用:
import asyncio
import logging
from asyncua import Client
logging.basicConfig(level=logging.ERROR)
_logger = logging.getLogger('asyncua')
async def main():
#create connection, please modify the ip of the url before connection
client = Client(url="opc.tcp://192.168.142.128:4840")
client.set_user('elite')
client.set_password('elibot')
await client.connect()
print("Client connected")
try:
#IsPowerON
is_power_on = client.get_node("ns=1;i=54275")
name = (await is_power_on.read_browse_name()).Name
value = (await is_power_on.read_value())
print(f"Before:{name} = {value}")
#PowerON
object_node = client.get_node("ns=1;i=54267")
method_node = client.get_node("ns=6;i=7001")
input_arguments = []
output_arguments = await object_node.call_method(method_node, *input_arguments)
#Wait 3 seconds
await asyncio.sleep(3)
#IsPowerON
is_power_on = client.get_node("ns=1;i=54275")
name = (await is_power_on.read_browse_name()).Name
value = (await is_power_on.read_value())
print(f"After:{name} = {value}")
except Exception:
_logger.exception('error')
finally:
await client.disconnect()
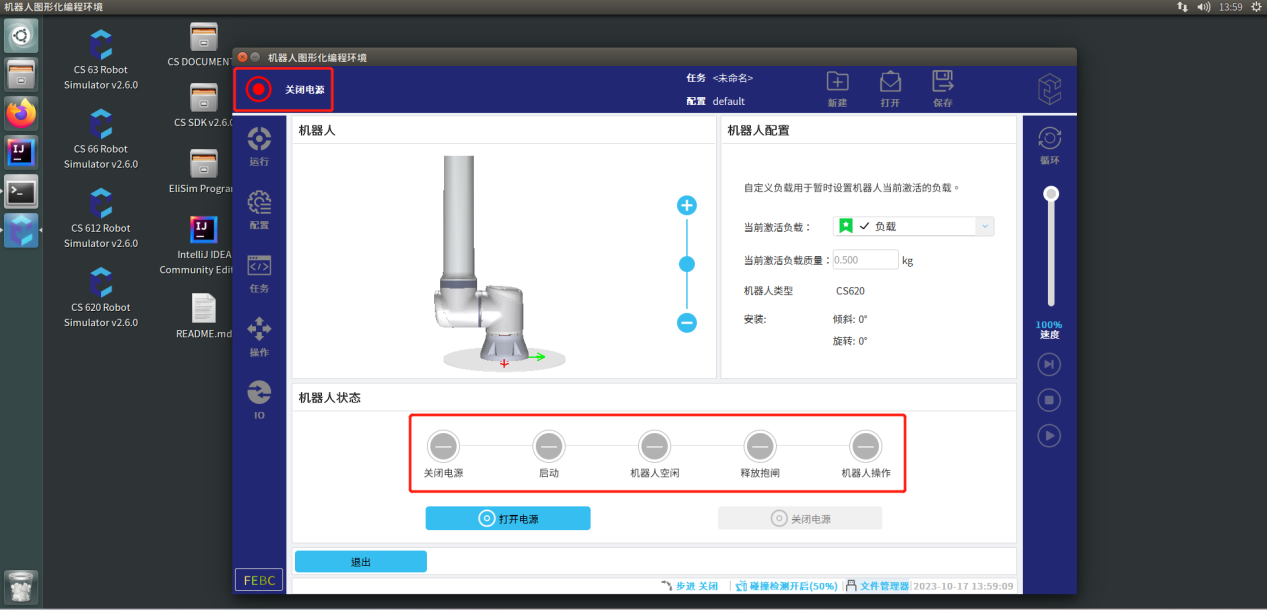
asyncio.run(main()) 只需要修改client = Client(url="opc.tcp://192.168.142.128:4840")中url的IP为上文所提到的虚拟机中的IP地址,运行该脚本即可执行以下命令,查询IsPowerON节点的值、调用方法PowerON打开Simulator中机器人的电源、等待3秒后再次查询IsPowerON节点的值,观察虚拟机中Simulator的电源状态,即可发现由原来的“关闭电源”变成了“待机”状态,Python终端中同时会输出以下内容:
Client connected
Before:IsPowerOn = False
After:IsPowerOn = True

下面我们将分别介绍一下节点查询和方法调用的写法:
首先,观察以下语句
#IsPowerON
is_power_on = client.get_node("ns=1;i=54275")
name = (await is_power_on.read_browse_name()).Name
value = (await is_power_on.read_value())
print(f"Before:{name} = {value}")
我们只要替换client.get_node()中的NodeId即可找到自己想要的节点,获取节点的名称以及值,关于NodeId可以在上文提到的UaExpert中进行查询
小练习:查询IsProgramRunning的NodeId,编写Python程序查询Simulator中的机器人是否正在运行程序
然后我们再观察以下语句
#PowerON
object_node = client.get_node("ns=1;i=54267")
method_node = client.get_node("ns=6;i=7001")
input_arguments = []
output_arguments = await object_node.call_method(method_node, *input_arguments)
首先我们需要通过方法所属对象的NodeId获取对象节点,然后再通过方法的NodeId获取方法节点,修改输入参数(如果该方法无需输入参数则为空)并调用方法
小练习:查询PowerOFF的NodeId,编写Python程序关闭Simulator中机器人的电源
接着我们再来看看这段Python程序
import asyncio
import logging
from asyncua import Client

logging.basicConfig(level=logging.ERROR)
_logger = logging.getLogger('asyncua')

async def main():
    #create connection, please modify the ip of the url before connection
    client = Client(url="opc.tcp://192.168.142.128:4840")
    client.set_user('elite')
    client.set_password('elibot')
    await client.connect()

    print("Client connected")

    try:
        #get NodeId
        nodeid = await client.nodes.root.get_child(["0:Objects", "1:EliteROBOTS","6:Controller","6:ControllerOperatingInfo","6:Status","6:IsPowerOn"])
        print(f"IsPowerON:{nodeid}")

    except Exception:
        _logger.exception('error')
    finally:
        await client.disconnect()

asyncio.run(main())
观察程序的这一部分
#get NodeId
nodeid = await client.nodes.root.get_child(["0:Objects","1:EliteROBOTS","6:Controller","6:ControllerOperatingInfo","6:Status","6:IsPowerOn"])
print(f"IsPowerON:{nodeid}")
通过运行程序,我们可以获得这样的结果
Client connected
IsPowerON:ns=1;i=54275
从结果得知,我们可以通过client.nodes.root.get_child()来获取节点的NodeId,只修改浏览路径参数即可获取其他节点的NodeId,浏览路径可以在UaExpert中查看,只需要从Object层开始将节点属性的BrowseName中的数字和名称用“:”拼接并依次列出即可,通过浏览路径我们即可查询到该节点的NodeId
小练习:编写Python程序通过get_child()获取IsProgramRunning的NodeId

掌握了这种获取NodeId的方式后,我们便可以尝试获取节点树了
import asyncio
import logging
from asyncua import Client, Node, ua

logging.basicConfig(level=logging.INFO)
_logger = logging.getLogger('asyncua')

async def browse_nodes(node: Node):
    """
    Build a nested node tree dict by recursion (filtered by OPC UA objects and variables).
    """
    node_class = await node.read_node_class()
    children = []
    for child in await node.get_children():
        if await child.read_node_class() in [ua.NodeClass.Object, ua.NodeClass.Variable]:
            children.append(
                await browse_nodes(child)
            )
    if node_class != ua.NodeClass.Variable:
        var_type = None
    else:
        try:
            var_type = (await node.read_data_type_as_variant_type()).value
        except ua.UaError:
            _logger.warning('Node Variable Type could not be determined for %r', node)
            var_type = None
    return {
        'id': node.nodeid.to_string(),
        'name': (await node.read_display_name()).Text,
        'cls': node_class.value,
        'children': children,
        'type': var_type,
    }

async def task(loop):
    url = "opc.tcp://192.168.142.128:4840"
    # url = "opc.tcp://localhost:4840/freeopcua/server/"
    try:
        client = Client(url=url)
        client.set_user('elite')
        client.set_password('elibot')
        # client.set_security_string()
        await client.connect()
        # Client has a few methods to get proxy to UA nodes that should always be in address space such as Root or Objects
        root = client.nodes.root
        _logger.info("Objects node is: %r", root)

        # Node objects have methods to read and write node attributes as well as browse or populate address space
        _logger.info("Children of root are: %r", await root.get_children())

        tree = await browse_nodes(client.nodes.objects)
        _logger.info('Node tree: %r', tree)
    except Exception:
        _logger.exception('error')
    finally:
        await client.disconnect()

def main():
    loop = asyncio.new_event_loop()
    asyncio.set_event_loop(loop)
    loop.set_debug(True)
    loop.run_until_complete(task(loop))
    loop.close()

if __name__ == "__main__":
    main()
小练习:修改并运行上面这段程序,查看程序运行的结果,思考输出的内容是如何产生的