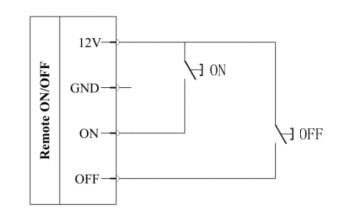
To power on the robot and runs the main task with external signals only, serveral configuration need to be done step by step.
To power on the robot, the 12 volt port and On port need to be wired to a push button or a relay. The power switch under the controller need to be turned on. When the circuit creates a quick pulse, the robot controller boots up.
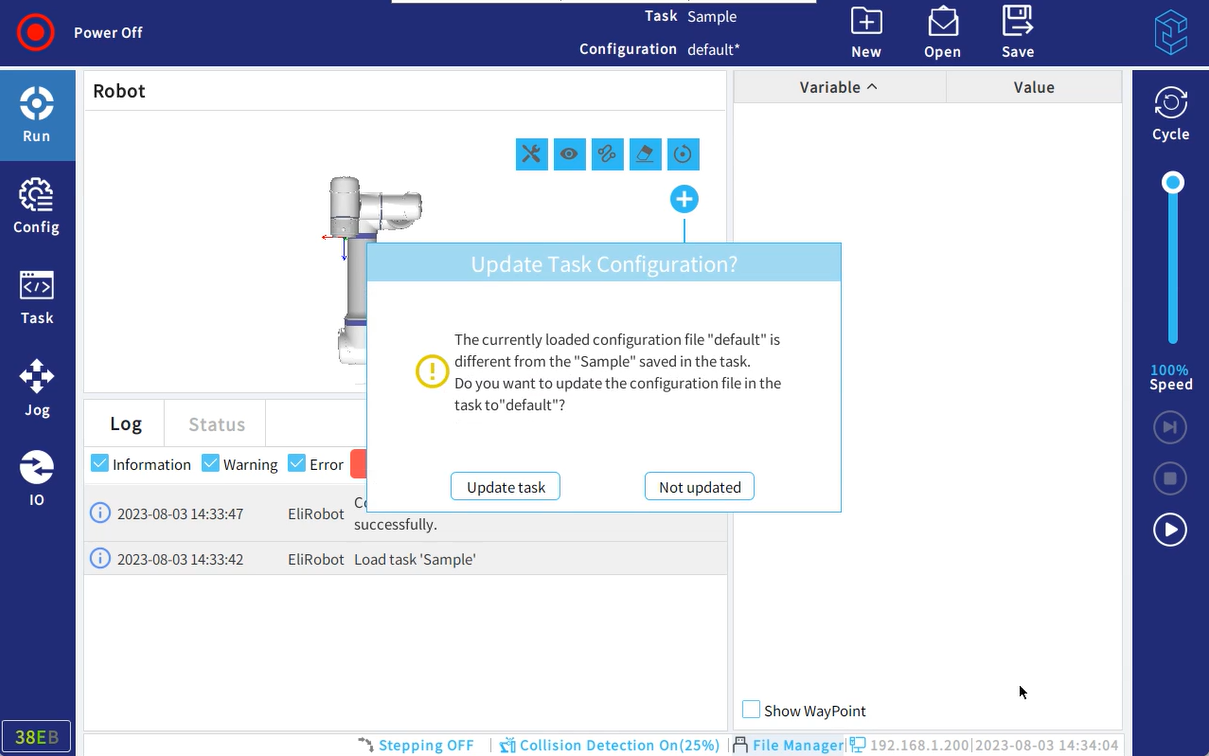
Next target is to make the system loads the main task and main configuration file automatically after system startup. Every task file binds with a configuration file, when open a task file, the configuration file binds with it will automatically open up too. However the system will automatically loads the default configuration file after startup, so some setting need to be done on the default configuration file first.
Open the default configuration file, choose "Not Updated" if the following dialog box popup. So the binding between the current task and current configuration won't be broken.
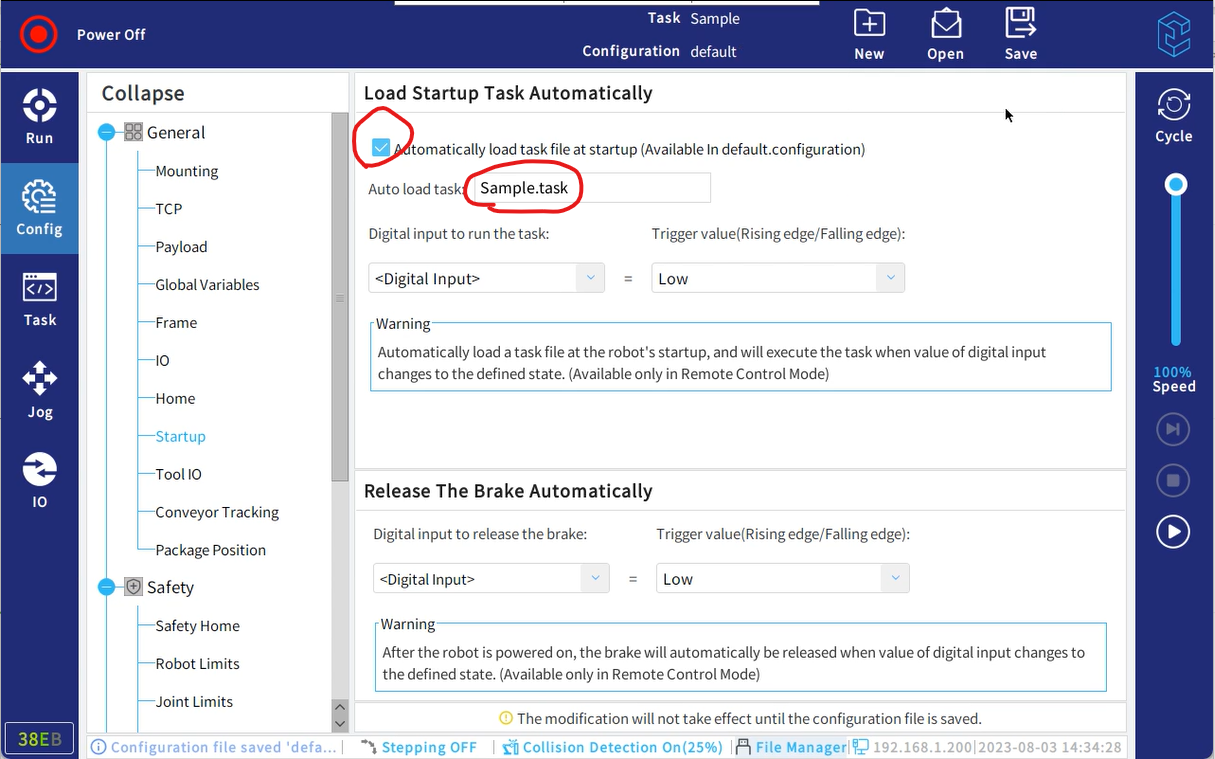
Under configuration tab, go to Start Up, set the task to automatically load up after system booting up. Save the configuration.
After restart the system, the log shows the default configuration file was loaded first, then selected task loads up, and the configuration file bind with follows up too.
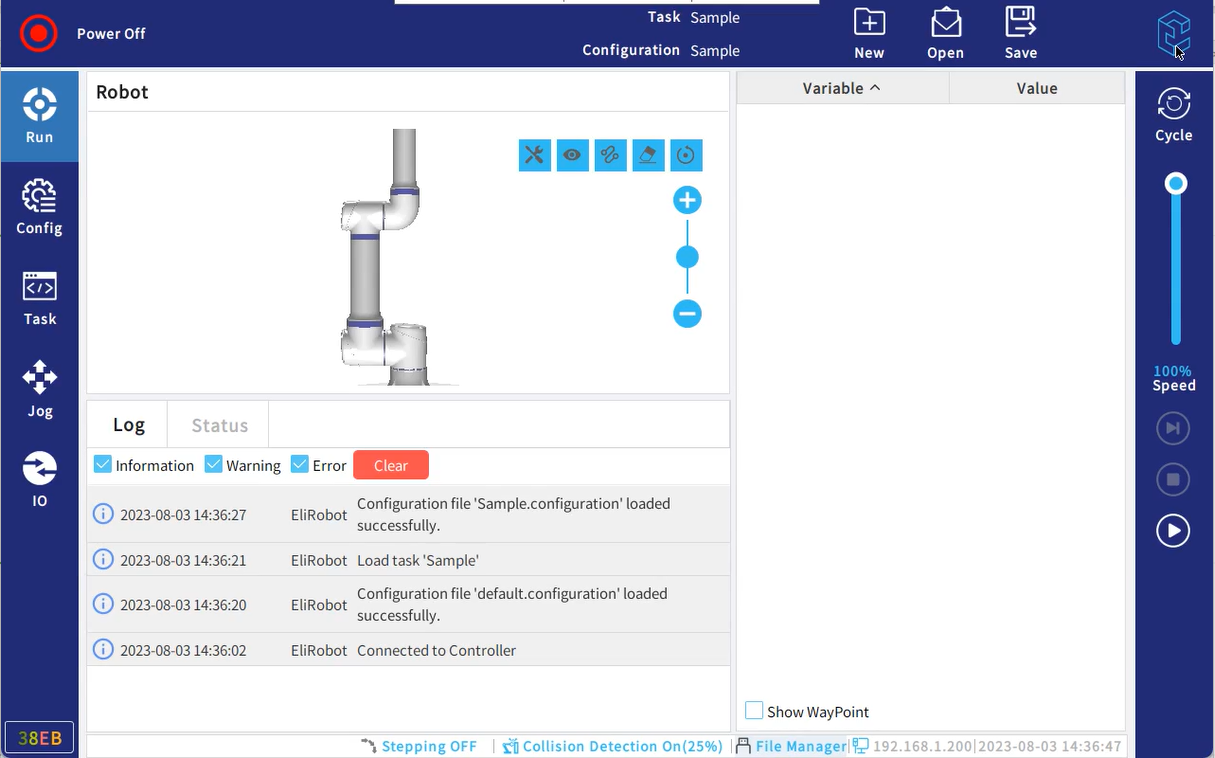
The robot cannot run the task without power on the robot body, which will be configured next.
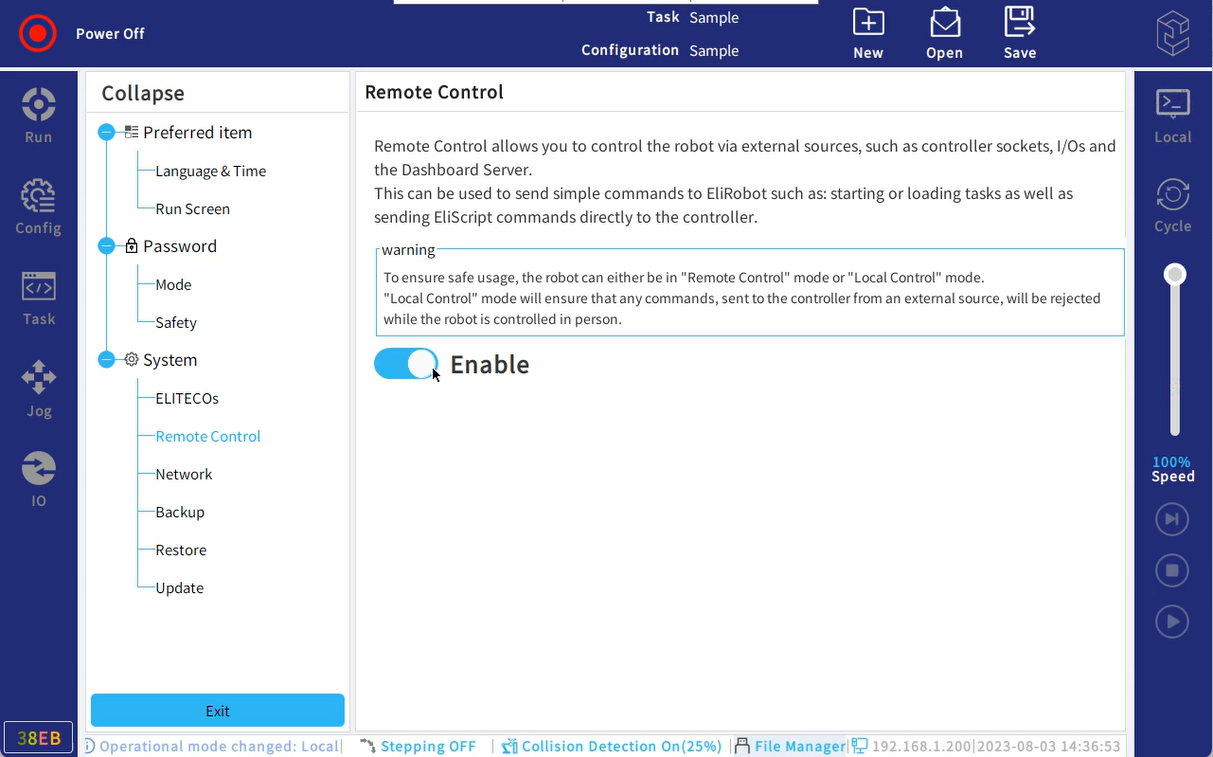
Click on Elite Logo, select Settings. Enable Remote Control.
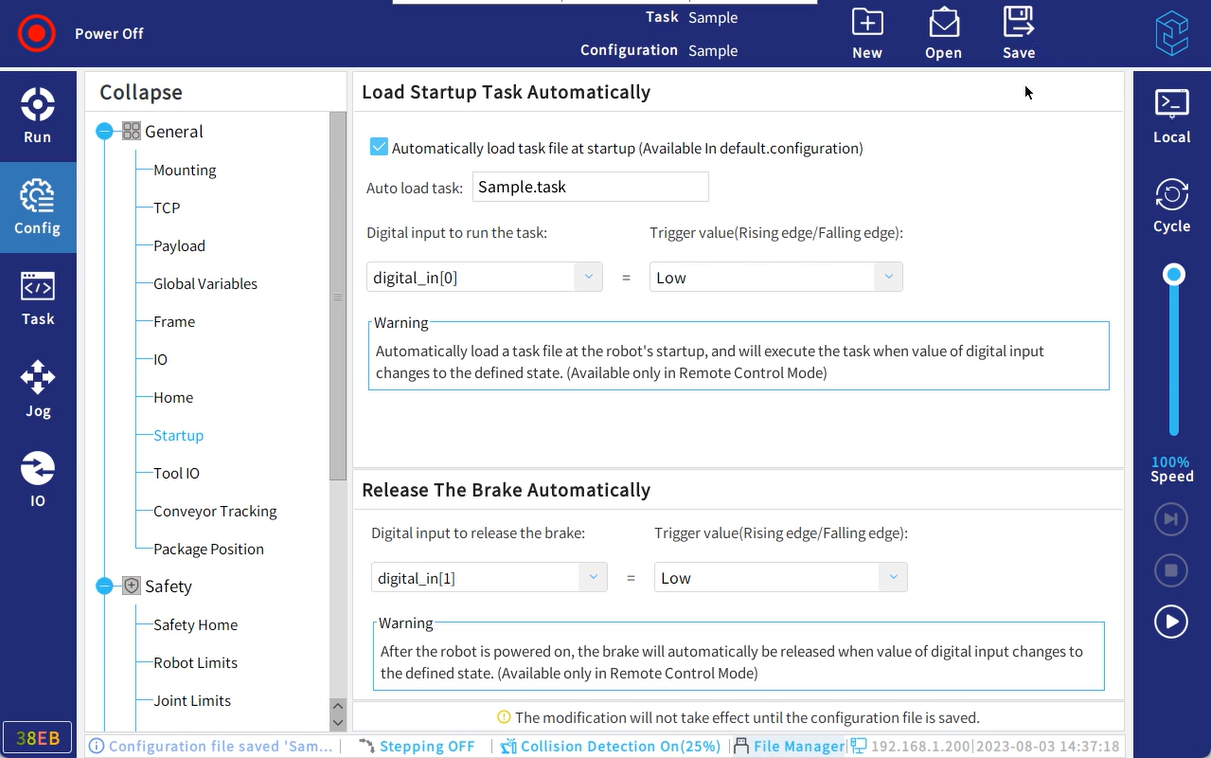
Go to Configuration tab, select Start Up. Configure the input signal to run the task and the input signal to power on the robot and release brake.
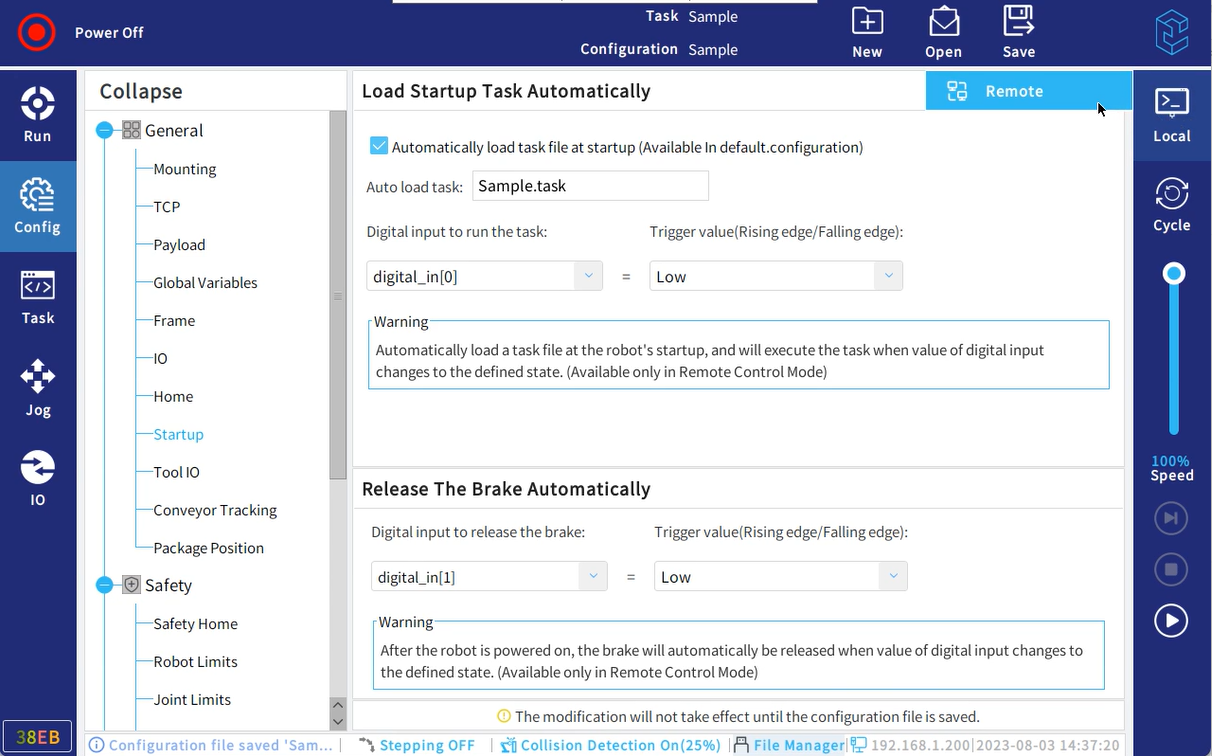
Save the configuration then switch to remote mode. Therefore, the system will automatically enters remote mode after booting up.
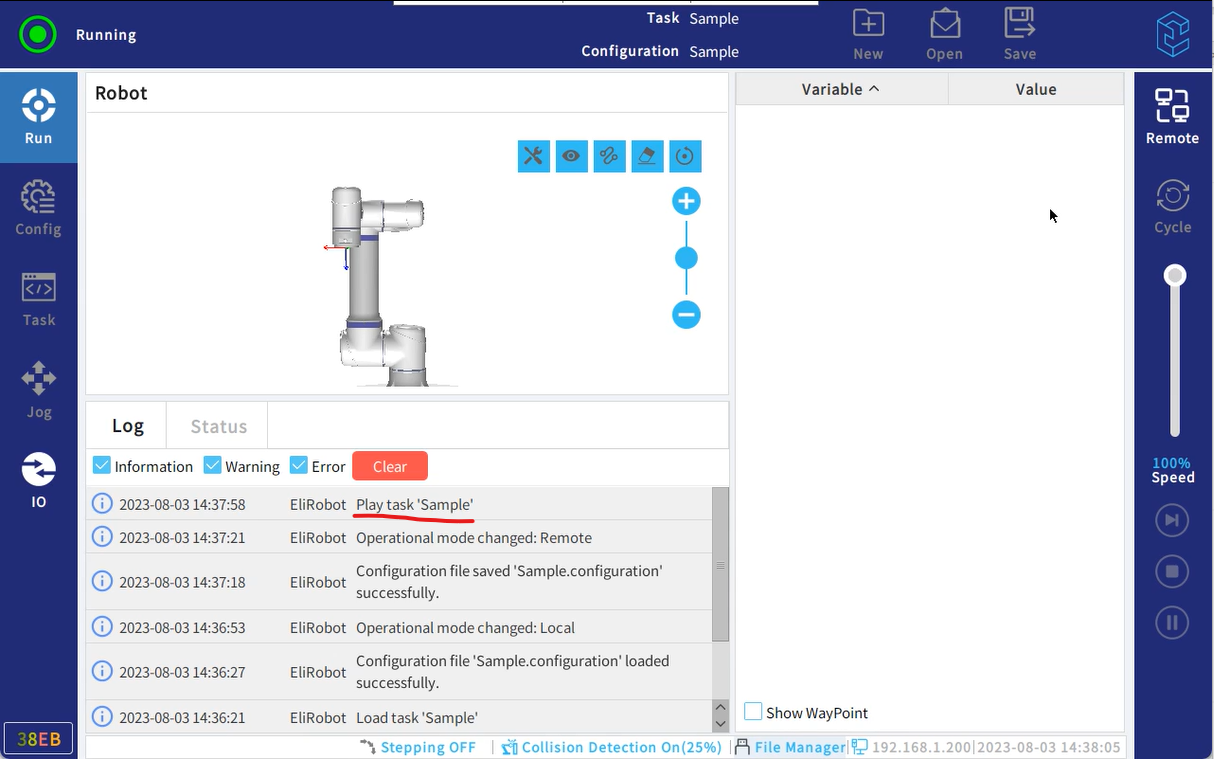
Input pulse signal to DI1, the robot powers on and releases brake. Then input pulse signal to DI0, the log window shows the robot is running the main task.
